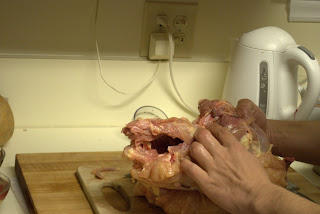
I used this to make a roast chicken. I tourned some carrots, quartered some red potatoes, sliced some onions and seasoned them all with salt/pepper, thyme, parsley, and bay leaves. Tossed with some vegetable oil. I then salted/peppered both sides of the chicken and laid it, skin side up, over the vegetables. Seasoned with thyme, and a little extra salt (I love crispy chicken skin)
I then used a kitchen torch to pre-crisp the skin a bit just enough so that the skin contracted. Then I put the whole thing into a 475 F oven until the vegetables were about half done. I then took the chicken off the veggies and let them finish at 450 while the meat rested.
To finish, I put the chicken on a baking sheet under a broiler for a few minutes, until the skin was crispy all over and nicely browned.
In between these steps, I browned the giblets, neck, and wing tips in butter and let the chicken fat render. I then strained the chicken fat into a sauce pan and made a roux with all-purpose flour. Meanwhile, I deglazed the pan and simmered the chicken giblets and wingtips with 2-3 cups of water and a sprig of thyme. Then I thickened the "quick stock" with the roux, and continued to simmer. After straining, I had a flavorful gravy to go with the roast chicken.
To plate, I made a pool of gravy and spooned veggies over that, then laid a half chicken on each plate. You'll have to believe me when I say this, but I'm not prone to hyperbole. That said, this was the best roast chicken I've ever had.
Step 1: Sharpen your knives.
Step 2: Cut out the wish bone by scraping and cutting the meat around it. Once you got it cut, pull it out with your forefinger and thumb.
Step 3: Flip the bird to expose the back. Slice a seam down the bird, careful not to cut into the meat.
Step 4: Find the articulation point for the shoulder. Twist and push up to expose it.
Step 5: Cut through the joint. Do the steps 4 and 5 for the other side.
Step 6: Grab the shoulder, lift, twist toward breast and pull down to strip the meat off the bird. This takes some force.
Step 7: Stop about 2/3 the way down. The bit of meat called "the oyster" should be exposed. Cut around it so it remains attached to the skin.
Step 8: Continue to pull the flesh off the carcass.
Step 9: Now find the articulation of the hip. Life, twist and the ball joint will pull out of the socket.
Step 10: Cut through the joint and pull the body off the carcass completely.
Step 11: Find the tenderloins on the carcass. They're located where the breasts used to be.
Step 12: Using your thumbs, push the tenderloin off the carcass. You may have to cut some silverskin.
Step 13: Lay the bird flat.
Step 14: Make slices around the thigh where the hip was.
Step 15: With the side of your blade, scrape down the bone, don't slice.
Step 16: Once you reach the "knee", slice around the top of the leg drumstick and continue to scrape down the bone.
Step 17: Break the leg and pull out the bone.
Step 18: Repeat steps 14-17 for the wings
Done


No comments:
Post a Comment
Thanks for your comment.